By GEORGE Z. CLONDAS
With cooler weather upon us, it’s time to move the home improvement projects indoors.
In the 18 years that we have owned our house, shy of getting a new roof and anything to do with our electrical panel (I know my limitations) I’ve been able to tackle just about any home improvement project that pops up. I’ve rebuilt windows and rotted portions of the deck, and remodeled bathrooms to name a few. But the project that has been at the top of my wife’s “honey do” list for many years has been new hardwood floors. It has always been one of those projects that seemed just a bit out of my comfort zone and to have someone else do it was out of my affordability range.
However, after seeing how it’s done and a promise of being able to borrow some of the special tools needed to do the job, I started to think I just might be able to pull it off. So, after consulting a few pros and a lot of how-to videos on YouTube I decided to give it a shot.
By no means do I claim to be a professional. This article is to tell the story of what I did, the lessons I learned along the way and hopefully inspire you to tackle a home improvement job yourself.
Figuring Out Square Footage 
The first thing I needed to do was figure out the square footage and how much flooring I was going to need. So, using some basic math, height X length = square footage (still haven’t found a use for high school calculus), I measured each room and hallway and got my total square footage. On average one box of flooring covers about 20 square feet, so a 10×10 room will need five boxes. I would recommend, depending on how many rooms you are doing, buying a couple of extra boxes of flooring because not all the boards are going to be usable. And also, since for me this was a “learning experience,” there were a few mistakes.
Getting my wife to decide on floor color and style was the hardest part of the job. Just kidding. But three trips to Home Depot and countless samples later we finally nailed it down, pun intended. But seriously, take the time to find what you love and want. This is an investment in your property. The last floor was there for 40 years, and I do not ever plan on doing this again.
Additional Supplies 
Other than the flooring, you will need to get an underlayment paper. There are a few choices. This will also help with some of the squeaking. Discuss this with a flooring representative to figure out what works best for your situation. Since my floor was going onto the kitchen, I went with a product that was waterproof.
You will also need an air compressor, flooring nail gun and a small nail gun to get into the tight spots. Luckily, I was able to borrow those tools. You can rent them, but depending on how long you are going to need them it might be more economical to just buy them. I also needed a table saw to rip any long boards to thickness and a chop saw to cut boards to length. You can cut to length with a table saw but for ease and accuracy’s sake I would go with the chop saw. The cuts will also come out much cleaner. You will also need a saw to trim moldings around doors and baseboards if you do not plan on removing them. I removed and replaced all my baseboards, which I found much easier and looked nicer than the 40-year-old boards. All I had to contend with was the bottom of the door trim, on which I just used a hand saw.
DEMOLITION!!! 
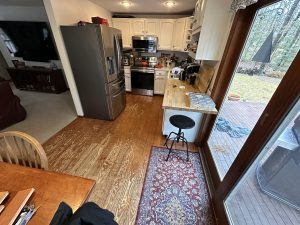
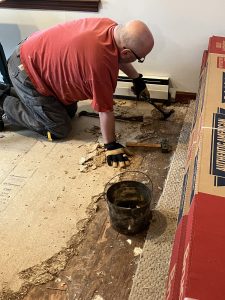
Preparation is the key to an easier installation of the new floor. Take the extra time to really remove your older flooring and fix any trouble spots. I had old wood flooring in our kitchen that transitioned to carpet in our living room. Once all the old flooring is up you really get to see the good, the bad and the ugly of what you are working with. I found a rotted spot by my back door needing some TLC, along with a section of subfloor in my living room that was almost a quarter of an inch higher than the piece of subfloor next to it. This was easy to hide with the old carpet but needed to be evened out if I had any chance of getting the hardwood floor to lay flat. That was not the worst of the problems. I found particle board floor underneath the old pine floor, and wanting a smooth transition from the kitchen to the living room meant it all had to go. There is no easy way to remove old particle board underlayment. This is where I spent most of two days, crawling on my hands and knees, pulling out nail after nail and prying up the old crumbling subfloor. I did find if I took out all the nails in a section of the particle board I could pry the whole piece up at once. Before you start the installation of the new floor take the time to clean and get up all the old nails and staples and get the surface as smooth as possible. Secondly, walk around and find all the squeaks and screw down any loose areas.
The Installation 
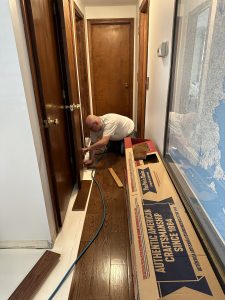
Once you have purchased your flooring, move it into the house to acclimate to the temperature and humidity of the surroundings. This will take a couple of days. If the flooring is in boxes, crack them open to let them breathe. The first row is the most important. It needs to be straight. You may think your home’s walls are perfectly straight, but most likely they are not. To get a straight line, measure off the wall about a quarter of an inch on both ends, take a chalk line and snap a straight line. It was shocking to me, seeing just how out of alignment my walls are. If your first row of flooring is crooked, this will compound the mistake on every course. What starts out as an eighth of an inch could grow and grow to an inch or more, depending on how many rows you need to do. You also have to allow for expansion when the humidity increases and swells the boards. I tried to leave at least a one-quarter to three-eighths of an inch away from the walls on all sides. Don’t worry, this will get covered up by the baseboards when done.
Now the real fun begins… lay out each row before nailing them down, making sure you like the color variations in the boards and to stagger the joints from the previous row. I tried to do a minimum of four to six inches. This doesn’t always work out, no matter how much you try. So don’t drive yourself crazy, just find something you can live with. When all is said and done no one will notice if it’s a little off. Now just repeat this process a few hundred times or so. Remember to take breaks. When you start to get tired this is when mistakes can happen. A mistake can set you back anywhere from a few minutes if you make a mistake nailing in a board or much longer if, God forbid, you injure yourself badly. Remember, be careful. You are using lots of sharp and pointy things. You are a lot softer than the wood you are working with.
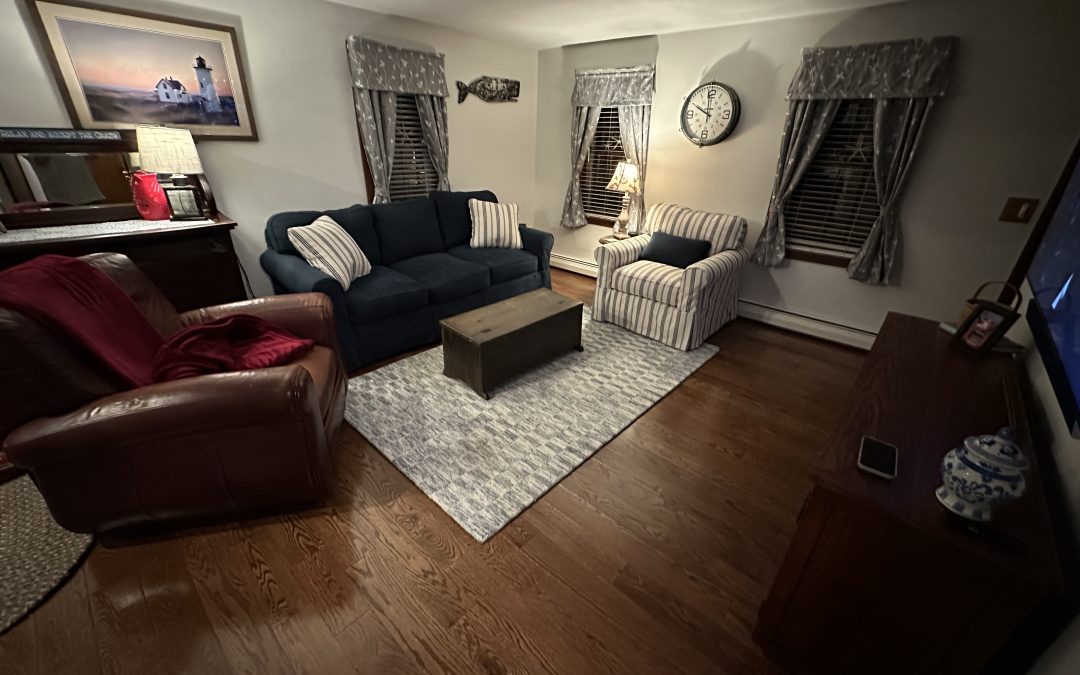
Once you get to the other end of the room, if you planned correctly you will still find the last row is still not straight. Remember, houses just are not perfectly square. All you can do is try and get it as close as possible. Luckily you can lay this last row down in multiple pieces and varying thicknesses to get your expansion gap and cover it with the baseboard or in my case, I planned covering it with the baseboard radiator.
In Conclusion
I’m not saying when all is said and done, you will be happy you did it. But be happy if not for the sense of accomplishment, then for the amount of money you saved by doing it yourself. And yes, my wife was very happy, too.
Tips & Tricks
Coloring and board size can vary from box to box. Open multiple boxes and select boards from each to help randomize colors and patterns. Remember to let the boards acclimate.
Buy an extra box of two of flooring. You will get bad boards. Not everything will be usable. If you have to go back and buy it later there is no guarantee the colors will match from lot to lot and from store to store.
Take breaks. This is a marathon, not a sprint.

